
As you know, I’d lost tonnes of photographs.
However, I’m glad to tell you that I’ve retrieved about 90% of them. Perhaps closer to 100%. Thanks to iRecover that I discovered at DIY DataRecovery.
The software is shareware, so I could test it before finally purchasing it. Best S$50 I spent, in my opinion.
Over the last few days, I’ve tested tonnes of software in an effort to get my photos back.
This allowed me to run into some curious software, including CHK-Mate a free utility provided by DIY DataRecovery. Like Eric Phelps’ unCHK that allows you to actually open up those damned .chk files that chkdsk creates. These utilities actually help you get back files with their names and sensible extensions like file000.jpg.
All in all, this was pretty good. I managed to find quite a number of files. CHK-Mate seemed to find more files than unCHK. Whatever you use, don’t waste your time with Flobo CHK Identifier.
The problem with CHK-Mate was, I had thousands of these jpg files. Sorting these files that now had generic file names by time, date, place would be a nightmare. There had to be a better way.
Finally I tried iRecover. In demo mode, it allows you to reclaim one directory at a time. It was impressive, but I wanted to find something that was cheaper.
PCFileInspector only found deleted files but it is entirely free. It has saved me before and I’d recommend it any day as a place to start.
EasyRecovery Professional Trial was free but EasyRecovery Professional is not. It ran slow and did not find the files iRecover did.
File Scavenger also did not find the files I wanted and is more expensive than iRecover.
I even tried PhotoRescue but it was totally useless for this purpose. It only “found” photographs in the trash. However, many have reclaimed corrupted photos using this software, so if I ever get a corrupted CF card, I might give it a try.
In the process, I also found software that could help recover data from corrupted CDs and DVDs called ISOBuster. As I don’t have a corrupted CD on hand (I’ve trashed all of mine) I did not get to test it. But now I know there’s something like this, I’ll think twice about trashing my CDs.
Also recommended is GetDataBack which I had difficulty downloading and so didn’t try.
Okay, here’s why I love iRecover, besides the fact that it got back so many of my photographs. The files it found had all the filenames fully intact. iRecover also writes these files in an entirely different drive, leaving your corrupted hard disk untouched.
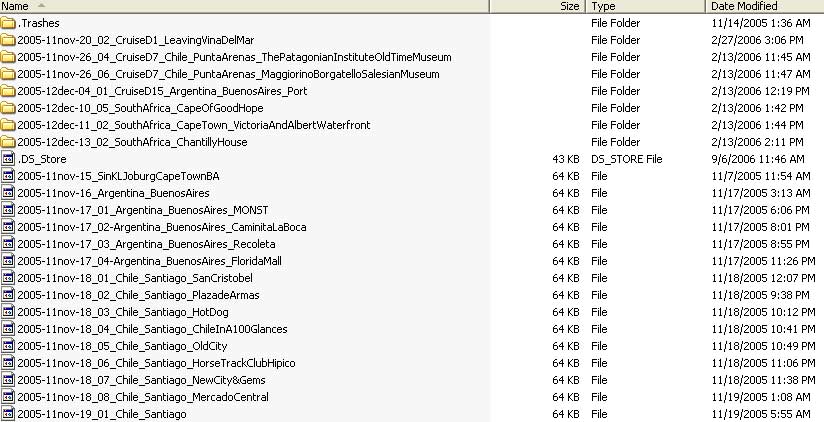
The folders were named FRG001, FRG002 and so on. Not all the numbers were running sequentially. It might mean something I don’t know.
However, since I had the 64kb files (that used to be folders), I could match the filenames to the former-folder names. It was now much simpler to sort the photos back to their original folders.
All I had to do was re-create the folder names on some other drive and move the files iRecover found into them.
Where iRecover failed on some folders, I ran iRecover again on that specific folder and on the second time, the files came out perfect.
The drawback about iRecover is that you have to get both the FAT or NTFS version if you want to be fully covered. The good news is that you only need to buy software when you really need it. As I share my drive between the Mac and PC, I got the version for FAT only.
One huge lesson I’ve learnt in the process of finding the right software for my file recovery – NEVER run the chkdsk with the /f (fix) flag.
I repeat. Never let chkdsk fix errors on your hard disk. This makes data recovery all the harder because chkdsk only creates these useless .CHK files and then writes onto the disk, moving files around, changing the contents of the drive.
It is better to leave a drive in its faulty state and let some other file recovery software have a look at it. A good file recovery software will only write the recovered files on another hard drive. It’ll also warn you not to install the software on the disk that you are trying to recover data from.
If your hard disk has bad sectors, the first thing you need to do is to do an immediate clone of the hard disk. Again, I discovered a freeware called DrvClonerXP.
Using this software you have to clone the entire drive (not a part of it, as some can) to a drive of the same size or a larger one.
File recovery software will work on this cloned disk rather than the one with bad sectors. When all is good, trash the drive with the bad sectors. Or get a disk utility programme, mark the bad sectors as unusable and use the drive for temp files only.